NOTE· 2022-12-11· 4 min
The Best Lightroom Export Settings for Instagram 2026
Why Instagram compresses your photos and which Lightroom export settings keep quality loss to a minimum. JPG vs PNG, sRGB, sharpening, sizes.
UPDATE 2026: the new vertical feed grid. At the bottom I explain how to crop your photos for it.
Instagram is one of the most popular photo-sharing platforms worldwide, with around 1.27 billion monthly users. Even though the app keeps drifting toward short video, it still pays for photographers and models to post their photos there and present their professional work.
But have you noticed your photos on Instagram suddenly losing quality? That's a shame, because you put real work into the photos.
So what's the cause?
If you're still posting the largest possible quality and image size, this post is for you.
Quality loss on Instagram through compression
The cause of your photo's quality loss comes down to one word: compression. With every upload, Instagram reduces the file size of your image to save storage on its servers.
The trick is to give Instagram as little work as possible and deliver image files the way the platform wants them.
For that, two things matter: file size and image format / resolution.
I'll explain which settings to use in Lightroom (or any other photo app) to upload your images with as little quality loss on Instagram as possible.
The right resolution for Instagram
When you post an image, two sizes matter. The width of your photo must not exceed 1080 pixels and the height must not exceed 1350 pixels.
If you post a portrait in vertical format, the dimensions need to be 1350 x 1080 pixels (height x width). If you post something wider than 1080 pixels, Instagram converts the image to its own format. The same goes for height.
The result: your image quality suffers.
Instagram itself writes on its help page:
"If you share a photo at a lower resolution, we enlarge it to a width of 320 pixels. If you share a photo at a higher resolution, we reduce it to a width of 1,080 pixels."
Setting the right aspect ratio for Instagram
These aspect ratios and maximum sizes are natively supported by Instagram:
- 1:1 square: max width/height 1080 pixels
- 4:5 portrait: max width 1080 pixels / max height 1350 pixels
- 1.91:1 landscape: max width 1080 pixels / max height 565 pixels
In Lightroom you choose the right image format with the crop tool. Fortunately, 1:1 and 4:5 are pre-set options. The 1.91:1 ratio you have to enter yourself under "Custom".
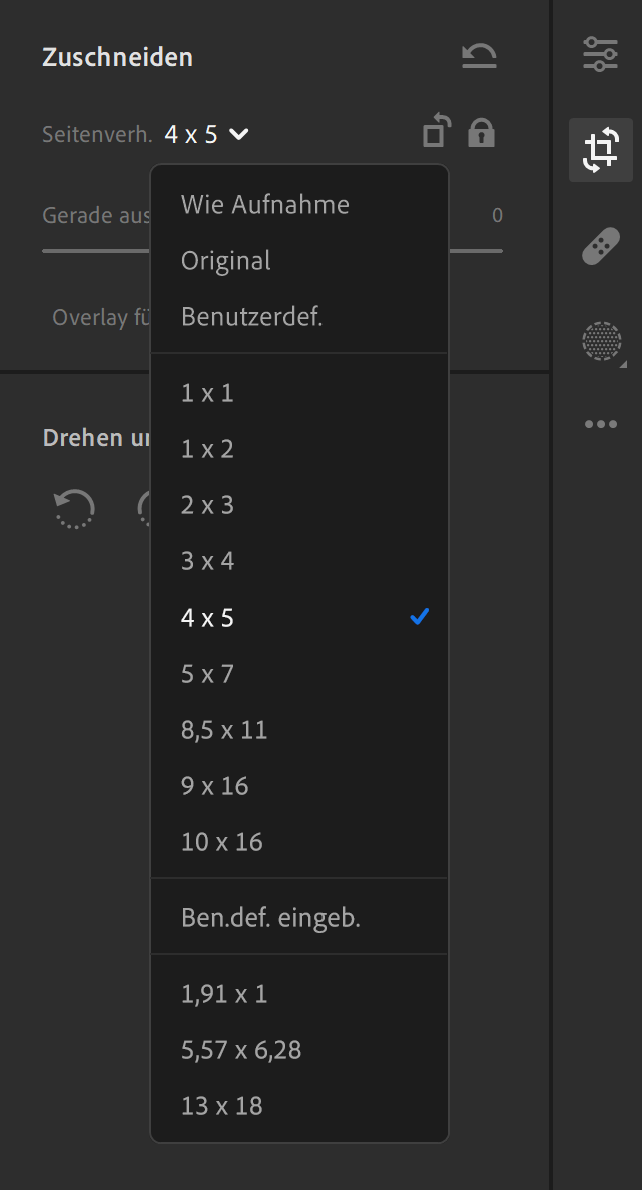
Under "Crop" in Lightroom you'll find the formats Instagram supports.
Once you've cropped the image, we get to the second important part: Lightroom's export settings.
The best Lightroom export settings for Instagram
Here's how you get optimal results for your photos on Insta in 5 steps:
- Use one of the native aspect ratios for your image (1:1, 1.91:1, 4:5). Anything else gets cropped by Instagram and quality suffers.
- Pick the file type JPG. It's not only Instagram's preferred type but also saves on file size.
- If your file is much larger than 1.5 MB, choose a lower image quality. I recommend 80%; you'll never see the quality difference on a phone screen.
- The output sharpening can usually stay at "Screen" and the amount at "Standard". Less is often more. New cameras and lenses already produce extremely sharp photos. The "Low" option also gets a lot of use from me.
- Choose sRGB as the color space. AdobeRGB or ProPhoto RGB output incorrect colors on Instagram.
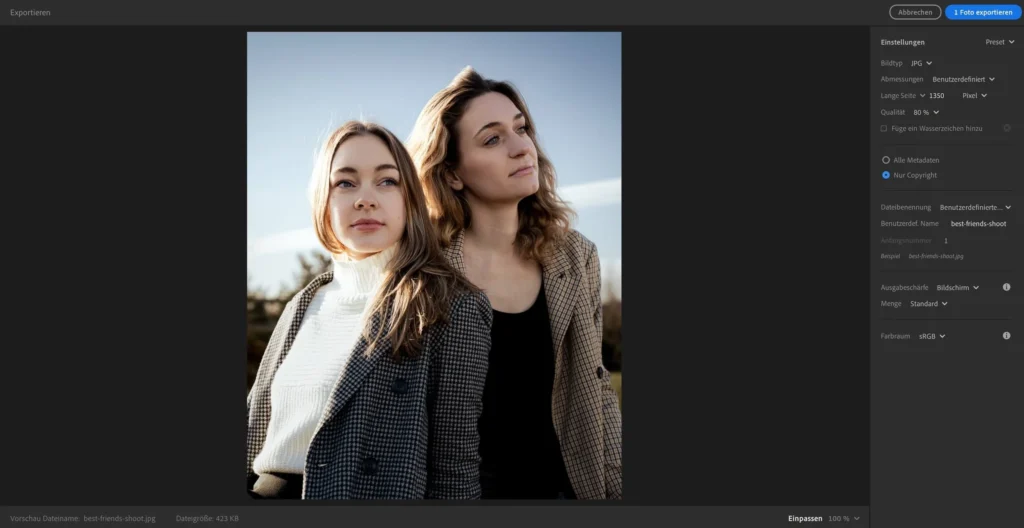
These settings get you the best image quality on Instagram from Lightroom. Shown here: (@annazzzoe and @account4eva)
The new Instagram feed grid: vertical instead of square
In early 2025, Instagram redesigned the feed view. Instead of a 1:1 square preview, the preview is now 4:3.
Watch out: even though you should still post in 4:5, the preview in your feed is slightly narrower. You can see the differences in this image.
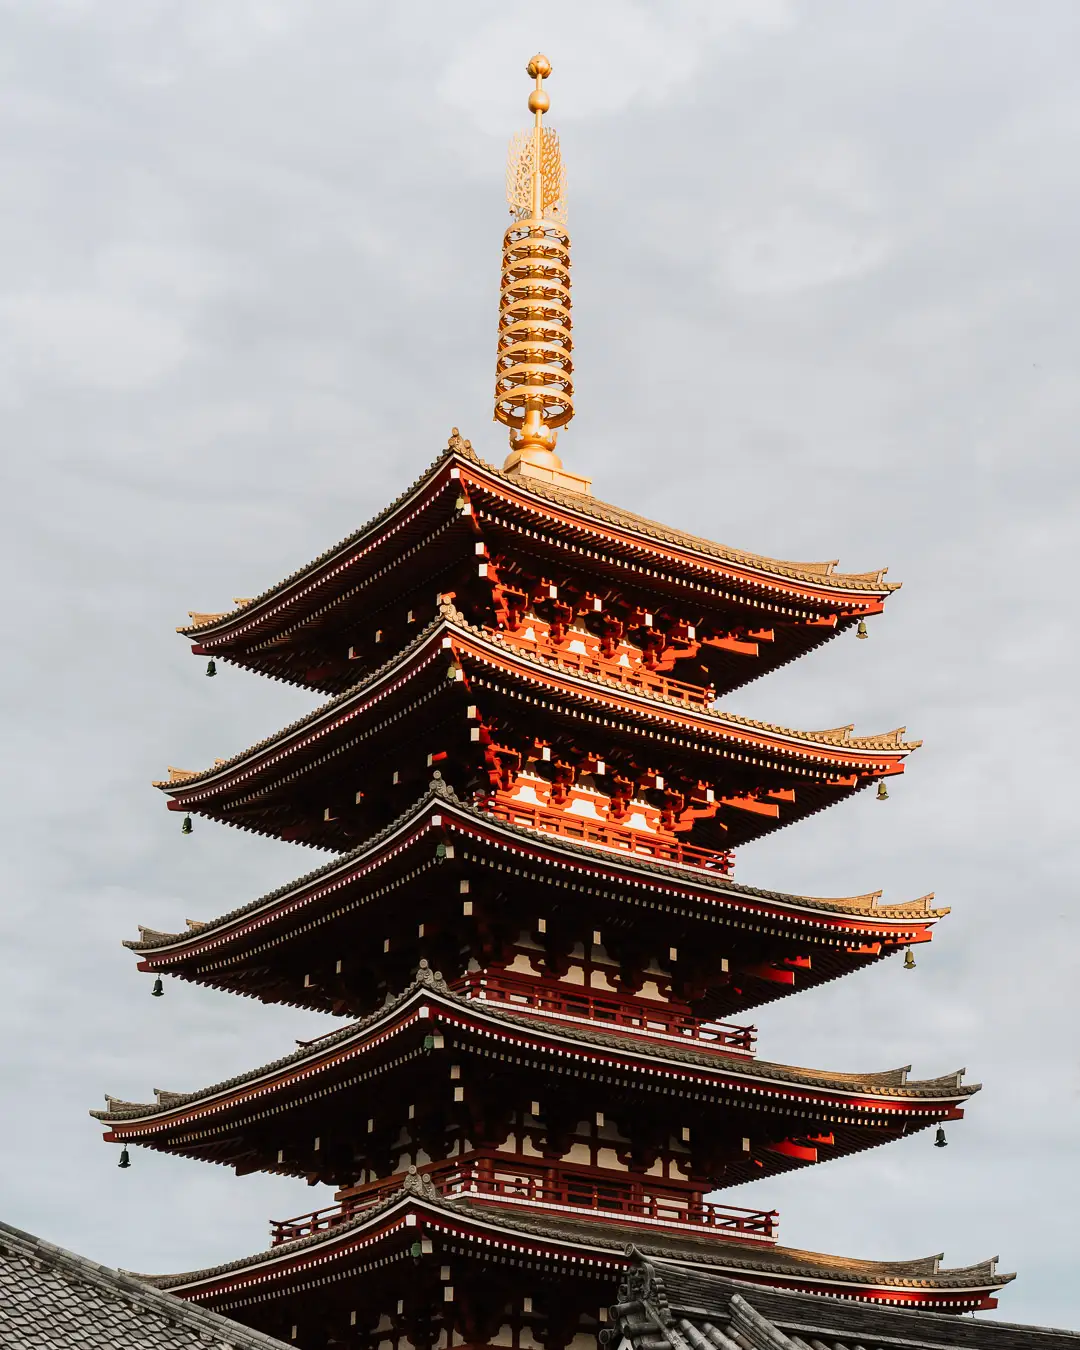
The feed view in 4:5, that's how you upload it. In the feed it still shows this way, with more room on the sides.
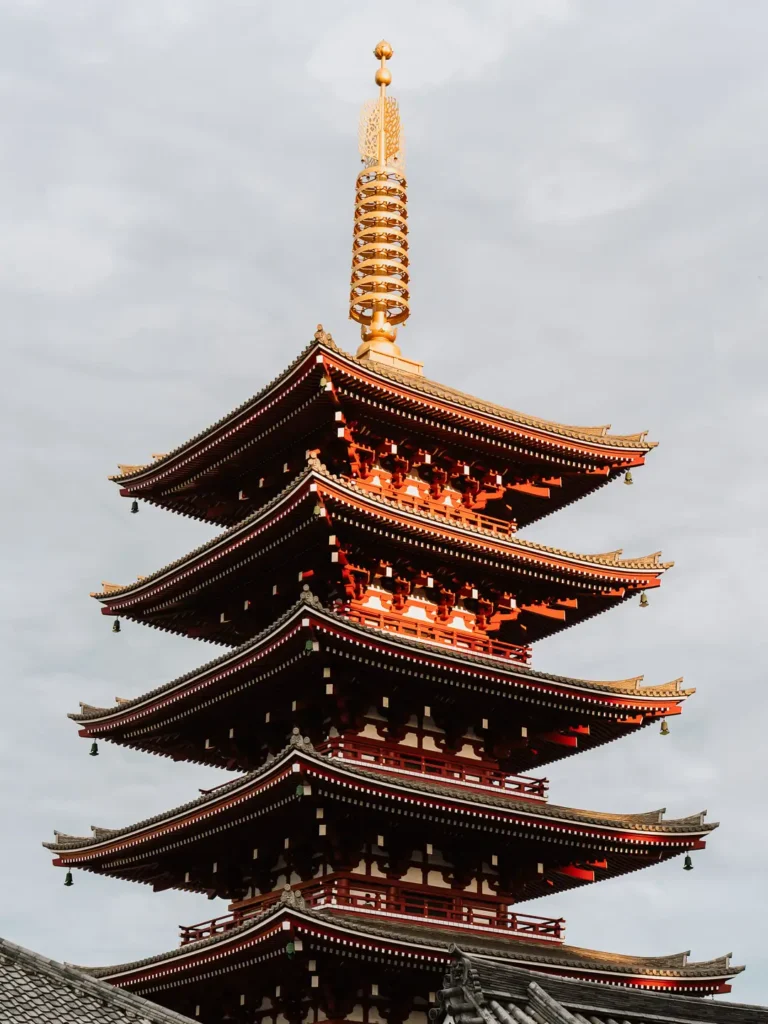
The profile grid view in 4:3, that's how your image now shows up in the Instagram grid. The sides are slightly cut.
As you can see, the preview on your profile has much less room on the sides. To be exact: 34px on each side.
My tip: build a 34px safety margin into your designs so your 4:5 posts don't get cut in the profile.
Have fun posting.
FAQ
- Why does Instagram reduce my photo quality?
- Compression. Instagram shrinks every uploaded file to save server storage, and it converts anything outside its supported sizes to its own format. If you post wider than 1080px, it scales down to 1,080px; smaller than that, it enlarges to 320px.
- What are the best Lightroom export settings for Instagram?
- Export as JPG in the sRGB color space at a native aspect ratio (1:1, 4:5, or 1.91:1), max 1080px wide and 1350px tall. Keep the file under about 1.5 MB (80% quality is invisible on phones) and set output sharpening to Screen at Standard or Low.
- How do I stop the new Instagram grid from cropping my photos?
- Since early 2025 the profile grid preview is narrower than your 4:5 post and cuts about 34 pixels on each side. Build a 34px safety margin into your design so nothing important sits at the edges.